Creating Custom Agents
You can only create and edit Agents through Mission Control in the Continue Mission Control web interface.
This ensures proper validation, versioning, and team collaboration features.
Creating an Agent
1
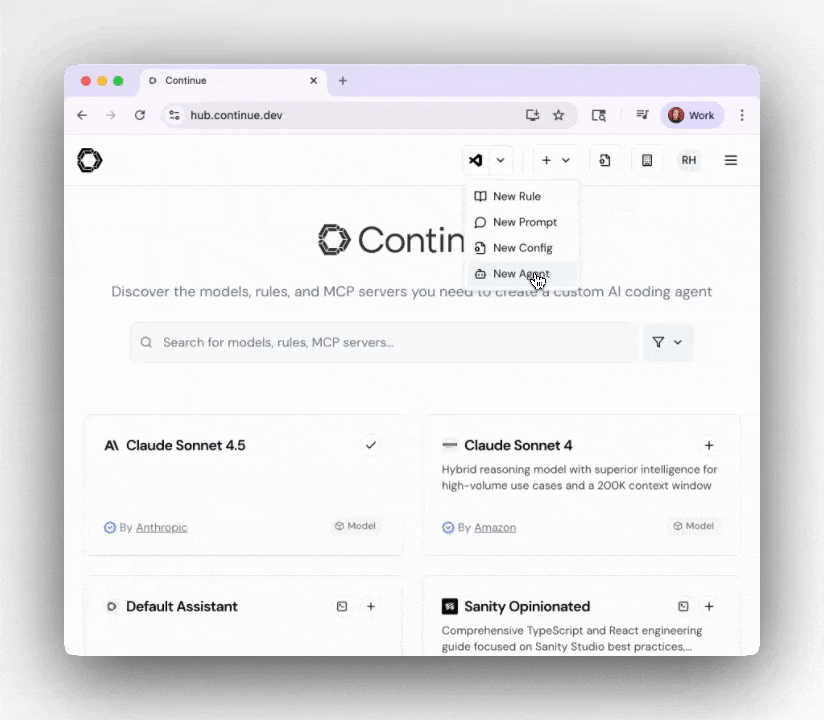
🧭 Navigate to Create Agent
From the Continue Mission Control top navigation bar, select ”+” → “New Agent”.This opens the Create an Agent (beta) form with all required fields.
2
🧩 Fill Out the Agent Form
Configure your agent with the following fields:
| Field | What to Enter | Example |
|---|---|---|
| Name | Display name shown in Mission Control | GitHub PR Agent |
| Prompt | First instruction the agent receives | Open a GitHub PR to fix the specified issue. |
| Description | What the agent does | Creates a pull request and includes AI-generated summaries. |
| Tools (MCPs) | Select built-in or custom MCPs | GitHub, PostHog, Supabase |
| Rules | Add any organizational rules | continuedev/gh-pr-commit-workflow, continuedev/summarization |
| Model | Choose a default LLM | Claude Sonnet 4.5 |
| Owner + Slug | Determines namespace | my-org/github-pr-agent |
| Visibility | Access level | Public, Organization, or Private |
Tip: Start with a simple prompt and add complexity through rules and tools. The prompt should be a clear, single instruction that defines the agent’s primary goal.
3
💡 Preview the Configuration
As you fill in the fields, the right-hand panel shows a live preview of your agent’s YAML configuration:This preview helps you verify the configuration before creating the agent.
4
✅ Create and Test
Click “Create Agent” to save and publish it.Your agent is immediately available to run in:
- Mission Control web interface
- TUI mode:
cn --agent your-org/your-agent-name - Headless mode:
cn --agent -p your-org/your-agent-name "prompt" --auto
Editing an Agent
You can edit any agent you own or that belongs to your organization.1
🧭 Access the Agent
From the Agents page or Mission Control view, click your agent’s name, then select “Edit Agent”.
2
🔧 Update Configuration
You can modify any of these components:
- Prompt
- Rules
- Tools (MCPs)
- Model & Visibility
Refine task behavior
3
💾 Save Changes
Click “Update Agent” when finished.The updated version is instantly available to your team with automatic versioning for change tracking.
Example Agent Configurations
Here are proven agent configurations you can create or use as inspiration:Security Scanner Agent
Snyk Continuous AI Agent - Comprehensive security scanning with Snyk MCP integration.Automates dependency analysis, vulnerability scanning, and creates remediation PRs with AI-powered fix suggestions.
Performance Monitor
Netlify Continuous AI Agent - Performance optimization with A/B testing and monitoring.Tracks Core Web Vitals, identifies regressions, and provides optimization recommendations.
Error Monitoring Agent
Sentry Continuous AI Agent - Automated error analysis and issue creation.Monitors production errors, provides root cause analysis, and creates actionable GitHub issues.
GitHub Management
GitHub Manager AI Agent - Comprehensive GitHub workflow automation.Handles issue triage, PR reviews, and release note generation with natural language prompts.
Database Management
Supabase Continuous AI Agent - Database security and management workflows.Audits Row Level Security, identifies vulnerabilities, and generates fixes automatically.
Troubleshooting
Common issues and solutions:| Problem | Solution |
|---|---|
| Agent doesn’t complete tasks | Simplify the prompt, add more specific instructions, verify tool permissions |
| Tools aren’t working | Check MCP configuration, verify API keys and permissions in Hub settings |
| Inconsistent behavior | Add rules to enforce consistent patterns, test with various input scenarios |
| Performance issues | Consider model choice, simplify complex multi-step workflows, optimize tool usage |